Deciding what voice over equipment is initially needed can be confusing for beginners. There is lots of advice out there but like all things, you need to know how to get the best for your budget. In this post on how to become a voice actor, we cover the voice over equipment you will need to get started and give you some options for different budgets.
Voice Over Equipment

Producing a technically acceptable voice over isn’t as difficult as you might think. With some basic equipment you can produce a reasonable quality recording. However, the quality of your voice over recording will depend on the quality of the equipment you use. This guide on voice over equipment will help you understand the essentials you need.
What Voice Equipment Do You Need?
Some audio retailers sell ‘packages’ that include everything you’ll need to record yourself—from microphone to audio interface to software. Buying one of these packages is often considerably cheaper than buying all the items separately, but keep in mind that one size rarely fits all and if the aim of the package is to hit a certain price point, compromises will inevitably be made somewhere.
Microphone: A microphone is required to capture the sound of the talent’s voice. The quality of your microphone will have a large impact on the overall quality of your recordings so it is important not to go too cheap here and buy a decent large diaphragm condenser microphone.
Preamp: The preamp or pre-amplifier, amplifies the electrical signal generated by the mic and converts it into a language your recording device (computer & recording software) will understand before it enters the system. The preamp is also an interface that supplies power (48v phantom power) to the condenser mic.
Headphones: You need to be able to hear the recording, so good closed back headphones such as Beyer DT250’s are essential.
Mic stand: You shouldn’t handle the microphone. When the mic stays in a fixed position on a mic stand, your recordings will be more consistent and even-sounding and free from rattles and vibrations.
Shockmount: A shockmount suspends a microphone with rubber or elastic bands (or utilizes similar kinds of suspension systems), which eliminates most of the vibration and handling noise the mic would otherwise pick up.
Pop-screen/pop-filter: Sensitive condenser mics can easily pick up the plosive sounds that the mouth makes and create ugly pops on the recording (“P” sounds pop). A pop filter is a screen that diffuses these sounds.
Recording/editing software: There are many audio recording software programs on the market. We have an excellent review of voiceover software at www.gravyforthebrain.com so please take a look. All of these programs do pretty much the same thing but vary in their complexity and ease of use.
Acoustic Treatment: Being able to hear the ambience (echo) of a room is very undesirable for all voiceover recording, so it must be controlled if you aim to achieve professional results. Essentially you need to create a home studio. Your home studio must be able to keep unwanted external noise out and at the same time control the sound reflections within the space.
Voice Over Equipment – Microphones
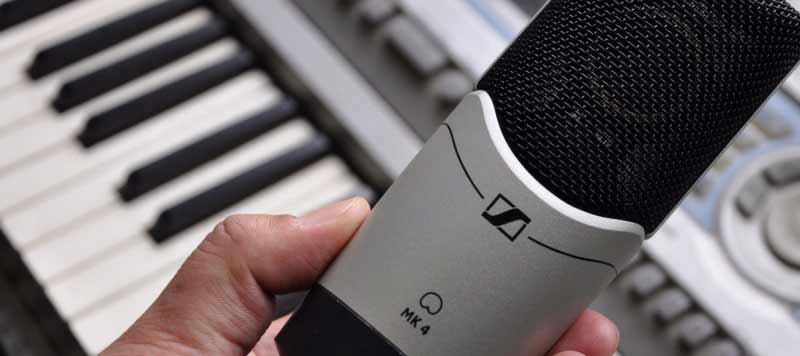
When choosing a microphone for voice over work, you need to consider your voice as well as your budget. If you pick the wrong mic for your voice it can affect the quality of your voice over recordings. The good news is, you don’t have to spend a fortune. £200 or $300 will buy you a perfectly acceptable mic. At www.gravyforthebrain.com, we recommend the Senheisser MK4 and you can buy one in our shop at the cheapest price you will find anywhere. You can of course spend a small fortune on a microphone but the law of diminishing return applies the more expensive you go.
So, if you have a budget it is vital to buy a good quality microphone. Fortunately, a decent mic doesn’t have to come with a huge price tag.
To help you understand a bit more about microphones here is a FREE VIDEO from our course on how to create a home recording studio.
Some voice over microphones will fit your voice better than others. So visit a retailer and ask to try a few before you buy. Record the same piece of text on each one and listen back with and A/B/C comparison.
When it comes to buying a microphone, you don’t need one with lots of bells and whistles. dB pads and filters and pattern selectors are nice to have but are not needed for voiceover.
Voice Over Equipment – Preamp
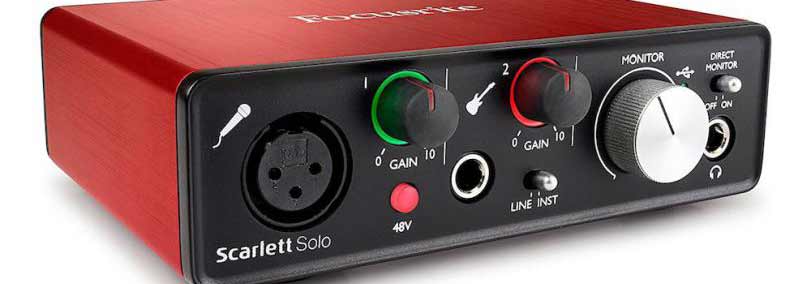
The preamp is an amplifier; it amplifies the electrical signal generated by the mic and converts it into a language your recording device (computer & recording software) will understand before it enters the system. The preamp is also an interface that supplies power (48v phantom power) to the mic.
The interface between your mic and your computer makes is the second most important link in the recording chain. Don’t be tempted to buy a cheap, noisy preamp. If you have a good quality microphone your recordings will end up being compromised by a poor quality, substandard mic preamp. Pair a good mic with a good preamp. Let the sound of your voice be your guide and don’t believe everything a salesperson tells you. It’s your voice and your voiceover career. Just make sure you buy a preamp that is sufficiently professional so it doesn’t add noise to your recording. More often than not, that noise—called ‘hiss’—can be the undoing of an otherwise wonderful take (more on that later). We recommend Focusrite Pre-amps. If you become a member of Gravy For The Brain you get 15% off all voice over equipment that we stock, including Sennheiser microphones and Focusrite Preamps.
Voice Over Equipment – Headphones

It’s important to wear headphones when recording yourself. This is because you don’t want the microphone to pick up sound from your speakers. Of course you need to record in a quiet room, and headphones make it possible to listen to your playback.
The best headphones to choose for recording your voice over are Closed-Back, Circumaural headphones. the reason for using these type of headphones and that the headphones are solid, which stops sound from leaking (and then being picked up your microphone). We recommend the BayerDynamic DT250 headphones. These are industry standard and are solid and reliable.
Voice Over Equipment – Microphone Stand
Good microphone stands don’t get nearly as much credit as they deserve. Because while novices think they’re all the same…experienced musicians know better. The truth is… quality counts. A good quality mic stand is one of the best investments you can make.
The 6 basic categories of microphone stands are as follows:
Tripod Stands: These are the most common and designed for general-purpose use.
Tripod Boom Stands: These offer a longer reach than standard tripod stands.
Round Base Stands: These are ideal for singers on stage, because they use less floor space and are harder to trip-over than tripod stands.
Low-Profile Stands: These are commonly used for kick drums, guitar cabs.
Desktop Stands: These are intended for podcasting and bedroom recording.
Overhead Stands: These are the largest and most expensive of all stands, and are used when extreme heights and angles are required, such as with drum overheads.
Most voice over artists record sitting or standing at a desk or table. Your best choice then will be a desk stand or a studio arm. A desk stand is a compact, table-top version of a microphone stand. A studio arm is a balanced, articulated boom arm that can mount to a desk or a table or a wall with either a removable clamp or a permanent stud. Studio arms make it easy to quickly reposition a microphone.
If you prefer to stand while you work, and we recommend this, there are numerous microphone floor stands available. In this case a floor stand with a boom arms is recommended. The boom arm will give you more options for positioning the microphone.
The important thing to bear in mind is that each piece of voice over equipment in your recording chain affects the final sound quality.
Voice Over Equipment – Pop Shields
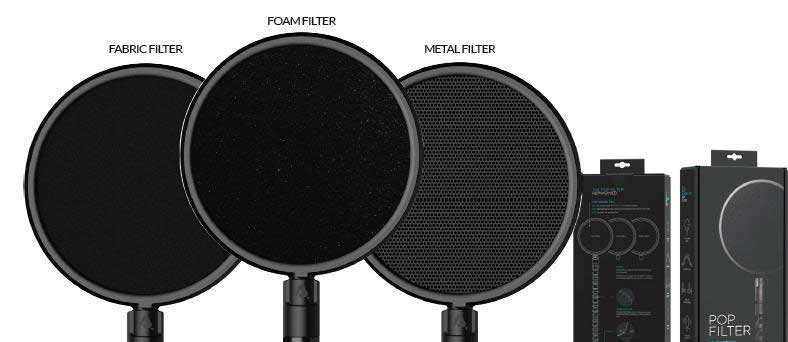
Without a pop-screen/pop-filter it’s impossible to control, the blasts of air that are produced by plosive consonants: especially b’s and p’s, as well as t’s. The filter doesn’t completely stop the ‘pops’ caused by these blasts, but it greatly reduces them. As someone who is new to voice over you still have to learn good positioning and microphone technique.
To get the best from a pop shield you need position the screen/filter a couple of inches away from the microphone. There are numerous types of screens available. The best professional pop shields are made of a disc of perforated and stretched metal. This deflects the blasts of air downwards and away from the microphone capsule. The other main type of pop shields are manufactured from black, stocking-like material stretched across a frame These are usually less expensive than the metal ones. At Gravy For The Brain we recommend Pop Audio pop shields, these are available at a 15% discount for members; this discount applies to all our voice over equipment.
Voice Over Equipment – Creating A Home Studio
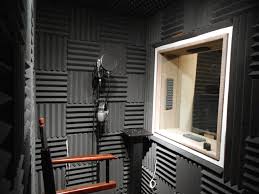
Creating the right acoustic environment for your voice over recording helps you to create the best recording. Ideally you need to create a home studio. This needn’t be as daunting as it sounds. Many people turn closets into sound booths or in fact create a room within a room. We actually have a very detailed course on how to create your very own home studio, which is available to members. For further reading check out our blogs. If you invest in good voice over equipment you want to get the best out of it.
The image below is how someone has put together an adapted model of a home studio.
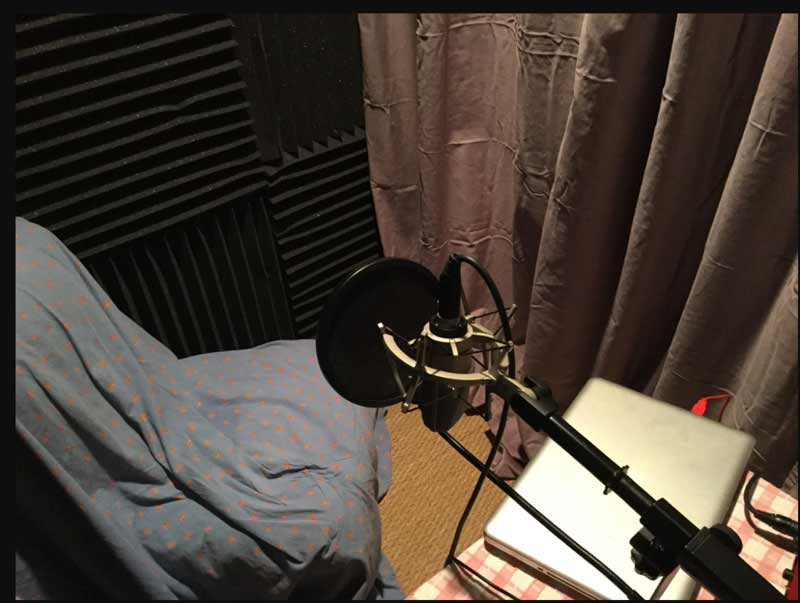
The image below is a typical professionally built voice over home recording studio.
Summary of Voice Over Equipment
We have covered the essentials of voice over equipment. Remember though to read our other posts on how to choose different types of voice over equipment and our great review of all of the current voice over recording software.
One essential piece of equipment is of course a laptop or PC. Since these vary in price and specification we are not recommending any brand here. Most audio professionals however, use Macs.
Based on our recommendations, here is a budget for the voice over equipment you will need to get started. Please note all prices are shown as standard retail and discounted membership pricing usually 15% better than RRP.
Microphone – Sennheiser Mk4 – normal price £245 / Membership price £205
Preamp – Focusrite Scarlett 2i2 – normal price £129 / Membership price £109
Headphones – BayerDynamic DT250 – normal price £119 / Not a member item.
Microphone stand – Dependent on type – Estimated price – £50 – £100
Shockmount – Some times included with a mic – if purchased separately – £50
Pop Shield – Pop Audio Classic – Normal price £40 / Membership price £36
TOTAL BUDGET – Lower end non members £633 / Lower end membership price £569
For more information on voice acting visit our series of posts on how to become a voice actor
[cp_popup display=”inline” style_id=”509696″ step_id = “1”][/cp_popup]
[social_warfare]